
In November 2009 I won an Outrun Deluxe Upright machine on eBay!

It was from Dundee. The previous owner said it was working originally, but hasn't been working for a while. The cabinet is in poor condition and needs restoration. I spent 3 hours dismantling it, so the cabinet is stable and movable by two people. I have the Owner's Manual so thought that I could bring it back to life. My house was hit by serious storm damage 3 weeks later. After long delays in 2010 and getting back into the house in April 2011 I am ready to get into restoring this machine.
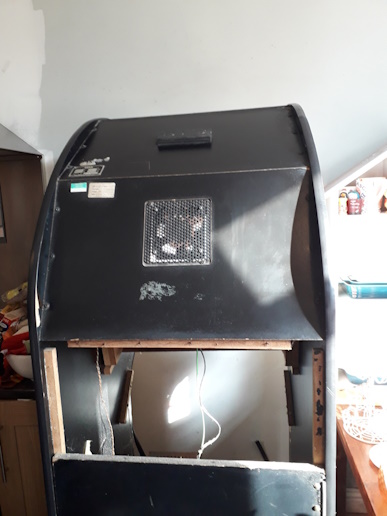
The first problem was that the baseboard broke off completely when the removal company were collecting it! The cabinet has had water damage at some point, so the baseboard is going in the bin. The front panel has been removed for access and, yes, no Outrun diagonal sticker emblem.
For safety I have removed all of the components except the monitor and put them in a safe, warm, dry room. i.e. pedal assembly, dashboard, screen mask, glass screen protector, bezel, motherboard, wiring loom, power supplies and rotten amp board.
A: I think this is the PCM Audio cable and that ground cable should be repaired.
2. The power supply has 2 fuses disconnected. There are 4 connected wires which should all have 2A fuses according to the rating plate. One of them has a missing fuse (no wonder the machine wasn't working!).A: This machine needs a complete overhaul of the electrical system by a competent electrician. The isolating transformer is for the monitor, shaker (dc rectified), amp (dc rectified) and marquee light.
3. The screen has a lot of burn-in. I would like to replace this with a LCD TV connected via SCART. The circuit diagram shows R, G, B, Sync and Ground. I have a friend who is good with electronics and he should be able to wire up a SCART socket for me. Is it possible to connect Outrun to a TV?A: This is a reasonable thing to do in the circumstances. I still have the header. A GBS-8000 video adapter has a different connection from the Sega Video Header. Resoldering the header and covering them with heatshrink is accepable or attaching the wires to a GBS-8000 header is also an option.
4. There is a 3 pin cable which "fell out of the bottom of the machine" (according to the delivery guy). It has a label on it that says BB. Does anyone know what that is for?A: This is the fan power cable.
5. Where could I get a set of tamper proof screwdrivers to open the speaker\marquee part of the case?A: Spalding Fasteners!
6. I can't get the accelerator pedal of the old base-board which is now lying out in the rain in my back garden.A: The base, pedals and metal work were given to a charlatan builder who claimed he could fix this for me. When I caught up with him he said he had used it for firewood! I had to buy replacement parts from the USA.
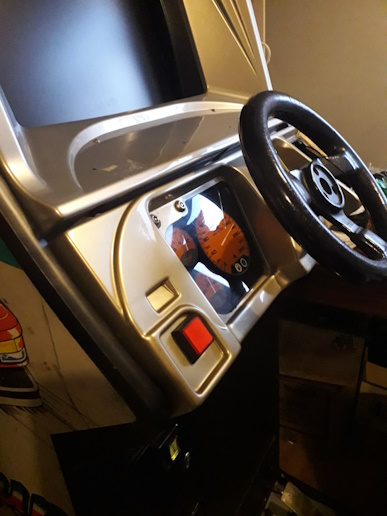
1. Note: the red start button. All the uprights I've seen have green circular start buttons.
2. The control panel is at a strange angle. It was held in place by 2 19mm screws at either side. It was not bolted on to the lip by the 3 bolts because one of the welded M8 nuts had sheared off. I suspect they didn't have a TR M8 screwdriver and had drilled them out and undone them with an Allen key. The loose bolt could weaken the dashboard and be dangerous. Drilling screws through the side however is just knuckle headed vandalism!
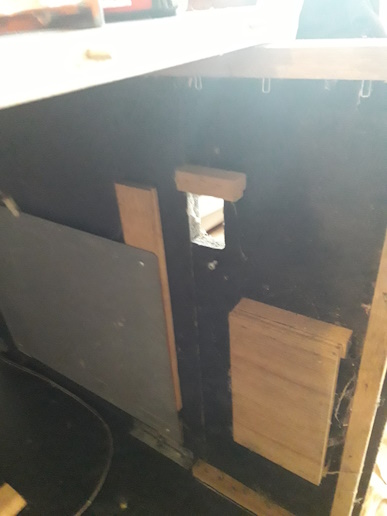
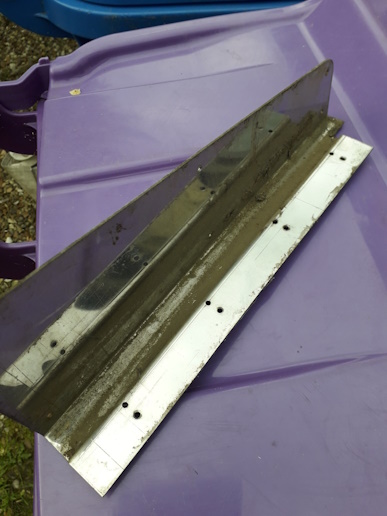
3. Here is some of the case damage at the front:

That's 3/4" T-Moulding. Nothing else will do.
4. Power supplies

There are 2 power supplies on there. A friendly electrician said that the secondary transformer is probably knackered and that's why its fuse has been removed. I need 4x2A slow blow fuses and an electrician to PAT test it.
Inspired by The 8-Bit Guy and availability of 2.5m x 0.6m x 18mm Black MFC at B&Q I decided to get this cab fixed once and for all.
Black MFC is hard to get in small sheets delivered to your door. In July 2024 I paid £35 + £12 Delivery (£5 off first online order). They even cut it into 2 equal sizes free of charge which is easier to store in the house.
I decided that this cabinet should be converted to a MAME cabinet to play other driving games due to the costs of recommissioning the power supplies and testing and repairs of the original PCBs. It should also run Cannonball for that 21st Century OutRun Experience.
I called on the services of Graham from Unit Seven to do all the cabinet making work.
The map is so precious it's still in the wrapper. I may use it or a good quality reproduction would be good enough.
I am thinking of getting a professional joiner to restore the cabinet. It needs new T-Moulding, about 4 inches repaired at the bottom left and right and a new base preferably with 2 fixed and 2 movable castors. If I can get rid of that old, heavy CRT then castors might be suitable.
Ideally I would like a fully working, light-weight, electrically safe Outrun machine.
Question: I wonder how much weight can be saved by binning the CRT and replacing it with an LCD TV?
Answer: About 25kg. A 20" Nanao monitor weights 25kg. I simply had to get rid of the CRT because of the space, weight, burn in and not being able to get people to service CRT monitors. I have kept the mounting frame with the spares.
The cabinet was stripped back to the bare essentials before work could commence.


Graham decided that the sides of the cabinet were so damaged he'd have to cut about 6 inches away from the bottom of the left and right sides. He used the new MFC to make new left and right "horns" from an MDF template made from the spare parts from the US Cabinet.
He used Festool Domino joints.

I removed the old power cable and switch. It was only held in place by 1 screw.
Graham then fitted the new floor made from 18mm plywood with 6 leg lifters. Note: 2mm channel for t-molding.
Floor fitted: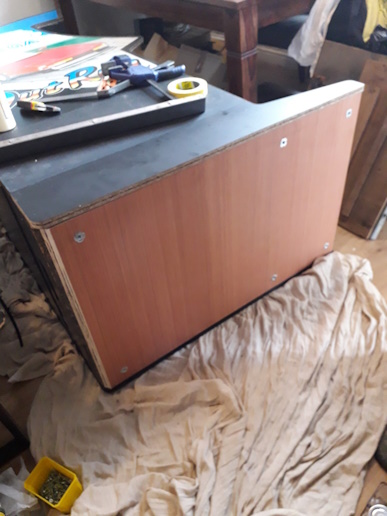
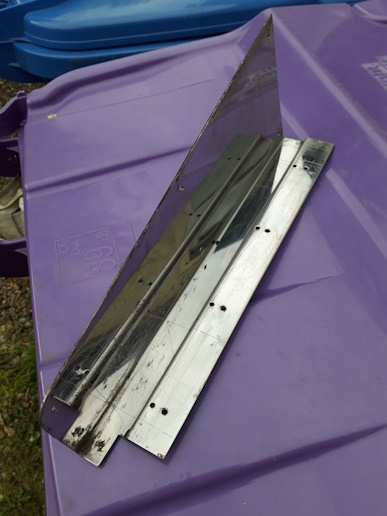
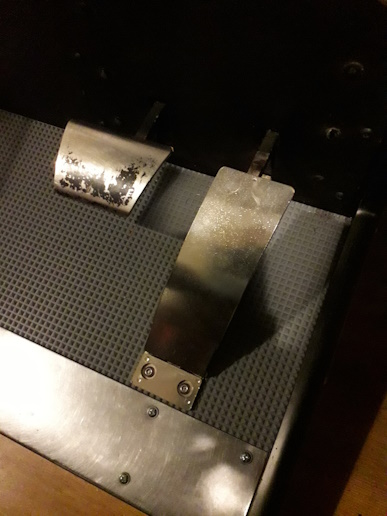
I cleaned up the metal parts. They cleaned up well with Mr Muscle Window Cleaner.
This appears to be sand, dust and grit and cleaned off as a paste with Mr Muscle.


Graham:
Holes had to be cut for the pedal box and coin box.

The dashboard was in the wrong place before. The shelf with the 3 M8x30s was in the cabinet where the shelf with the lower hinge should be! This has been corrected. The metal plate on the dashboard had been distored by 3 M5x20 screws. These have been replaced with M5x16. The lower shelf has been replaced with new wood, t-nuts and M5x16 screws.
It's an OutRun machine! I now have a complete and stable Outrun Cabinet!
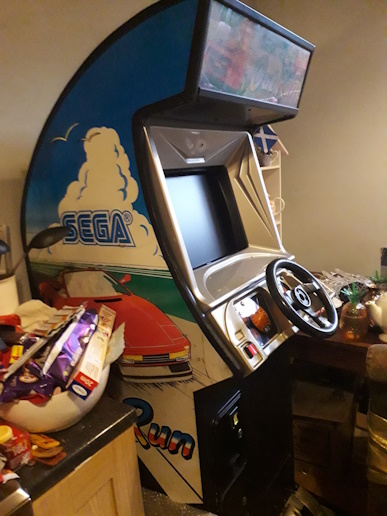
OutRun can be played (basically) by connecting a PC. It's up to me now to connect up all the controls, add a dedicated PC, clean the marquee, fit some new speakers and add some artwork (map, stripe, oval and start button decal).
Thanks to Graham at Unit Seven for his excellent work and knowledge and the members of UKVAC.
More pictures to follow as I work on this...
OutRun contains a 45V 1.1A (50W) shaker. This causes a very strong vibration and movement of a bar in the steering wheel when the car goes off road. This power is from a 35V AC tapping from the isolating transformer which is rectified to DC and boosted to 45V using the SSR Board (solid state relay).
On the Mini Cabinet this is a solenoid which knocks the wheel. This is mild compared to the shaker on the deluxe cabinet.
MAME Hooker can control the shaker, so can Cannonball but getting power delivered to the shaker is difficult so I have left it disconnected. A replacement wheel with a shaker such as a Thrustmaster 3 in 1 (very mild USB powered) or Thrustmaster T300 (untested) can be used for a pleasing rumble effect but fitting a Thrustmaster wheel through the OutRun dashboard looks really out of place.
| Item | Part | Qty | Manual Says | I Have | Same? | Notes |
| 1 | Marquee | 3 | M5x16 | M5x25. Black. | No | Mine are M5x25 with damaged heads, needs M4 bit. Replaced with new M5x25. |
| 2 | Bezel Holder | 1 | M4x16 | M4x16 | Yes | |
| 3 | Dashboard | 3 | M8x30 | M8x30 | Yes | Preferably use M8 washers. |
| 4 | Shifter | 4 | M4x10 | M4x10 | Yes | |
| 5 | Pedals | 7 | M5x16 | M5x20. Black. | No | Use M5 t-nuts on back. Use M5x20. M5x16 only engages with 3rd thread of t-nut. |
| 6 | Gas Pedal | 2 | M5x20 | M5x20 | Yes | |
| 7 | Dashboard hinge support shelf | 8 | M5x16 | M5x16 | Yes | 2 were OK. Replaced 6. Old shelf had imperial fine thread t-nuts. 2 were too long M5x20 and had distorted steering plate. |
| 8 | Outer bezel | 6 | Not Present | M4x30 | No | Looks like domed head mirror screws with M4 nut on back. Remove. * |
* My outer bezel has a production date of 5-2-90. This may have been added after a certain date to stop the map from being stolen! The new map will cover the holes.
Update: 1/1/2025
TLC Direct do not sell the 395mm version of this light fitting but the seller on eBay has these.
The supplied light fitting cable is too short to reach the power strip if it is at the bottom of the cabinet. The IKEA one is better.
I removed the old bulb. It was a Sylvania F15W/133 Cool White, 45cm, 880 Lumens.
The flourescent bulb uses 15 Watts but the new LED strip uses only 7 Watts. There is a good energy saving there. The packaging says LED Lumens: 770, Delivered Lumens: 570.
The old bulb was recycled at the local recycling centre. Flourescent bulbs are now considered hazardous waste because they contain a small amount of mercury.

I opened the marquee and tried to clean the marquee card with hot water and cleansing wipes but it did not remove the brown discolouration. I wonder if this is bromide as added to ABS plastic as a fire retardant in the 1980s. It looks like a layer of discolouration on ABS plastic which could be cleaned by Retrobright but I couldn't use Retrobright on printed card. I cleaned the glass with Mr Muscle Window Cleaner.
I removed the old circular metal fixings and put them in the spare parts box. It looks like discolouration on the wires going to the old Compton ballast. It won't be used again so I have left it there for future reference. Flourescent lights are becoming rare now and LED light fittings seem to be the way to go.

I installed the new LED light fitting clips. The screws are a few millimetres shorter than the old ones but slightly wider so they go in very well.

The cable supplied with the light is very thin and is not held strongly by the cable grip in a standard 3A plug. The Ikea Power Supply Cord is much better. To pull the cable through to the light fitting I fed the Knightsbrige cable through the top right hand side, sellotaped it to the Ikea cable and pulled it through to the top.
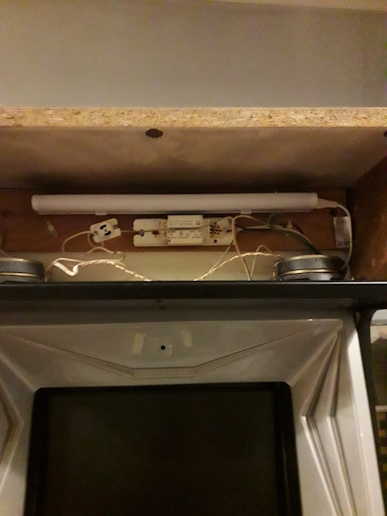
Power on and test.

Back to index.